Wood Skills Lab 2
Introduction to Joinery
Students will demonstrate the process of joining pieces of wood at a 90 degree angle.
Take Notes!!! We will be covering a lot of material very quickly and you will not be able to remember all of it. Even if you are familiar with a process and/ or material, each fabrication shop has its own safety procedures and ways of doing things. Our shop is no different. If done well, notes you take during the demos will provide you with an invaluable resource to use as you begin fabricating your own pieces during this class and future classes.
Demos
(Over)Lap Joints
- Cross Lap
- Half Lap
- Cross Lap
- Half Lap
Mortise & Tenon Joints
- Blind Tenon
- Through Tenon
- Bridle Joint
- Floating Tenon
- Through Tenon
- Bridle Joint
- Floating Tenon
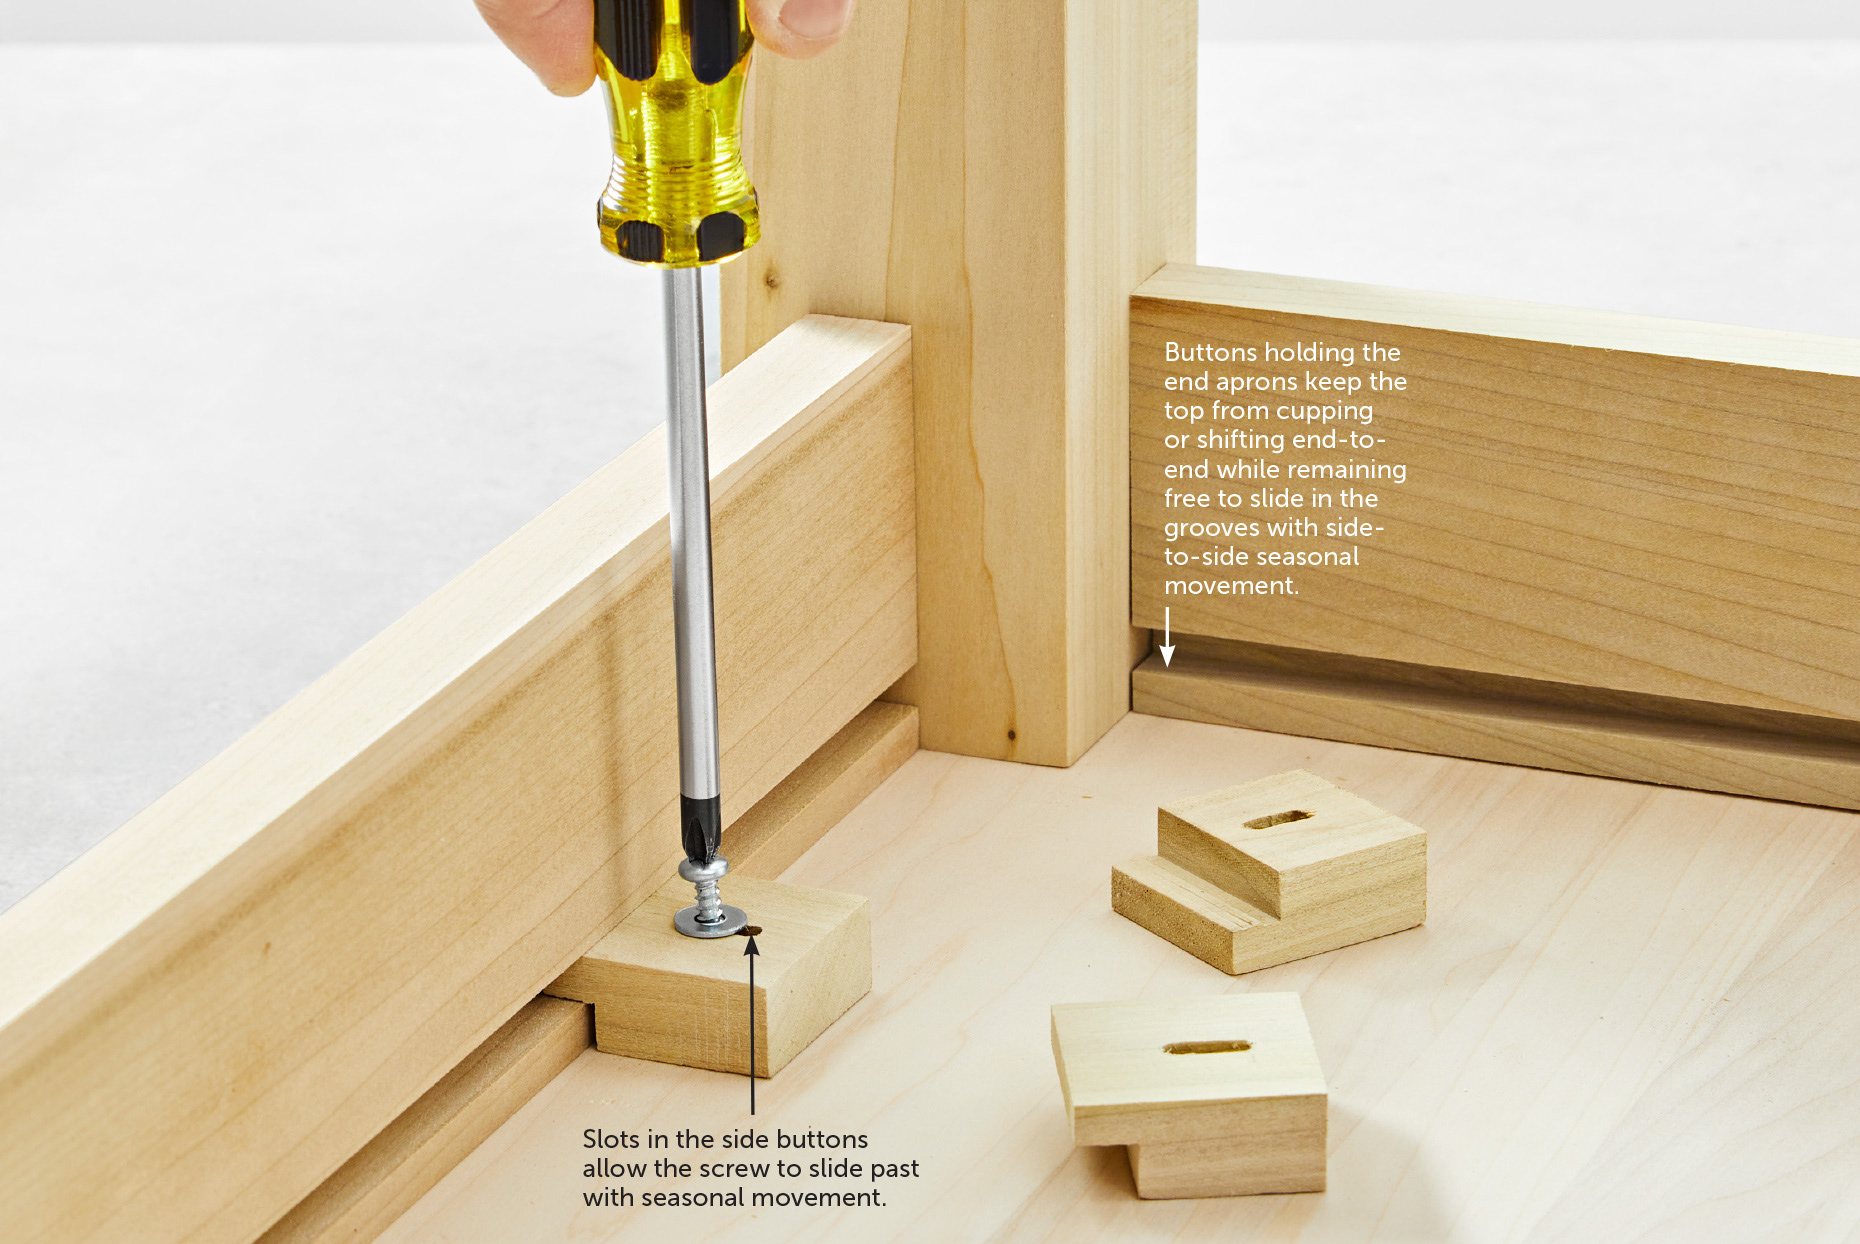
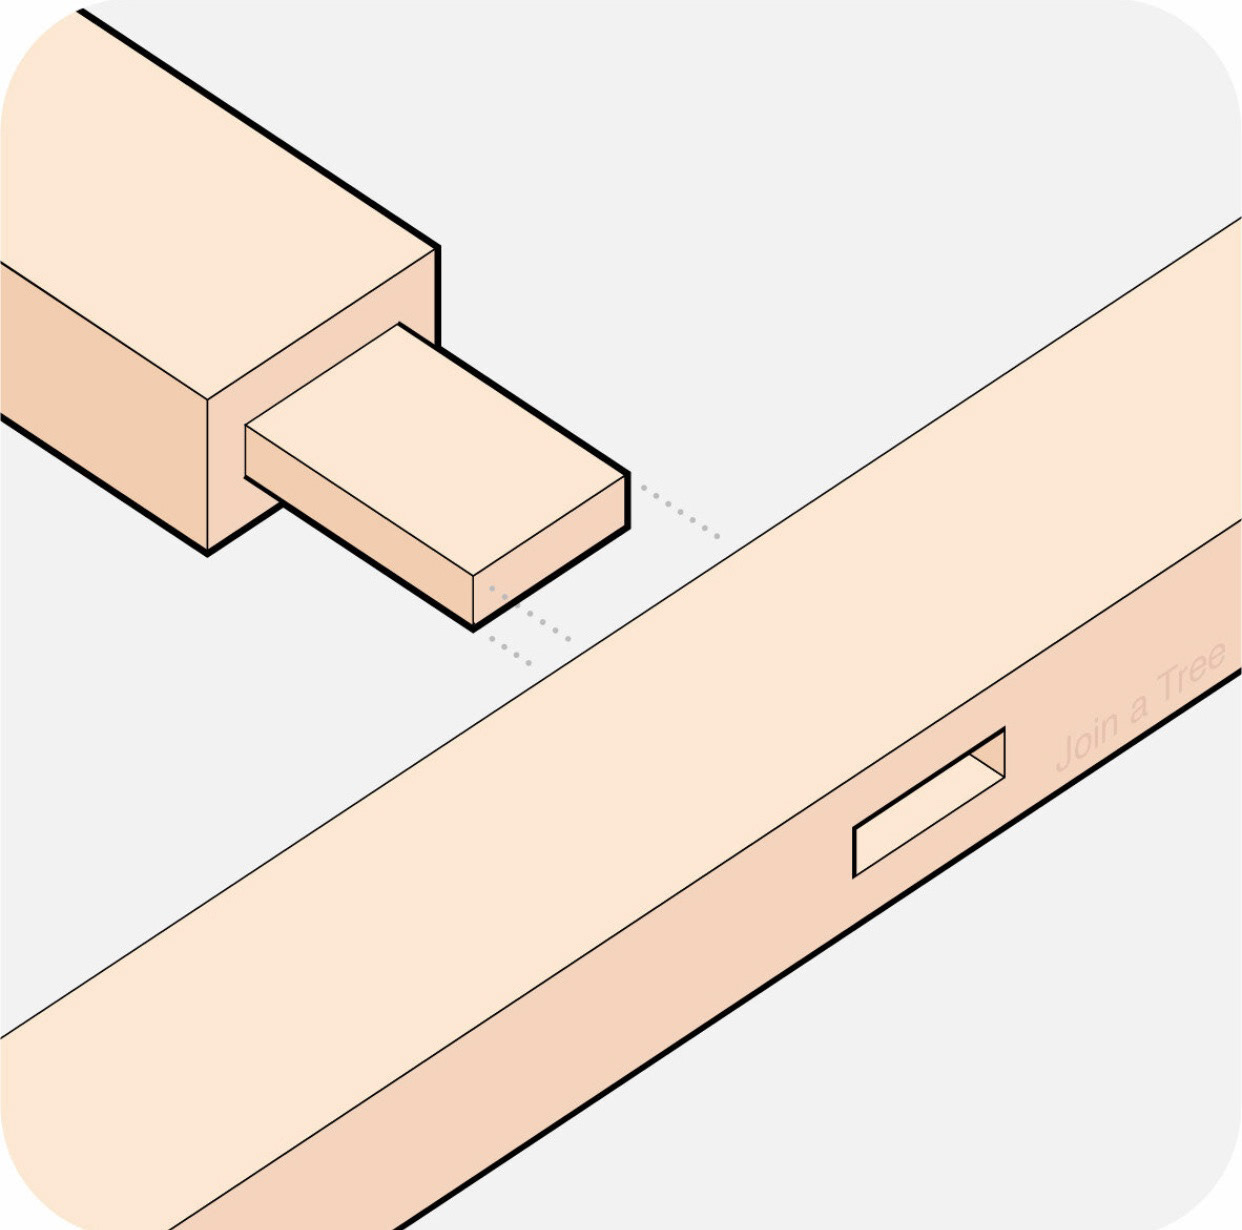
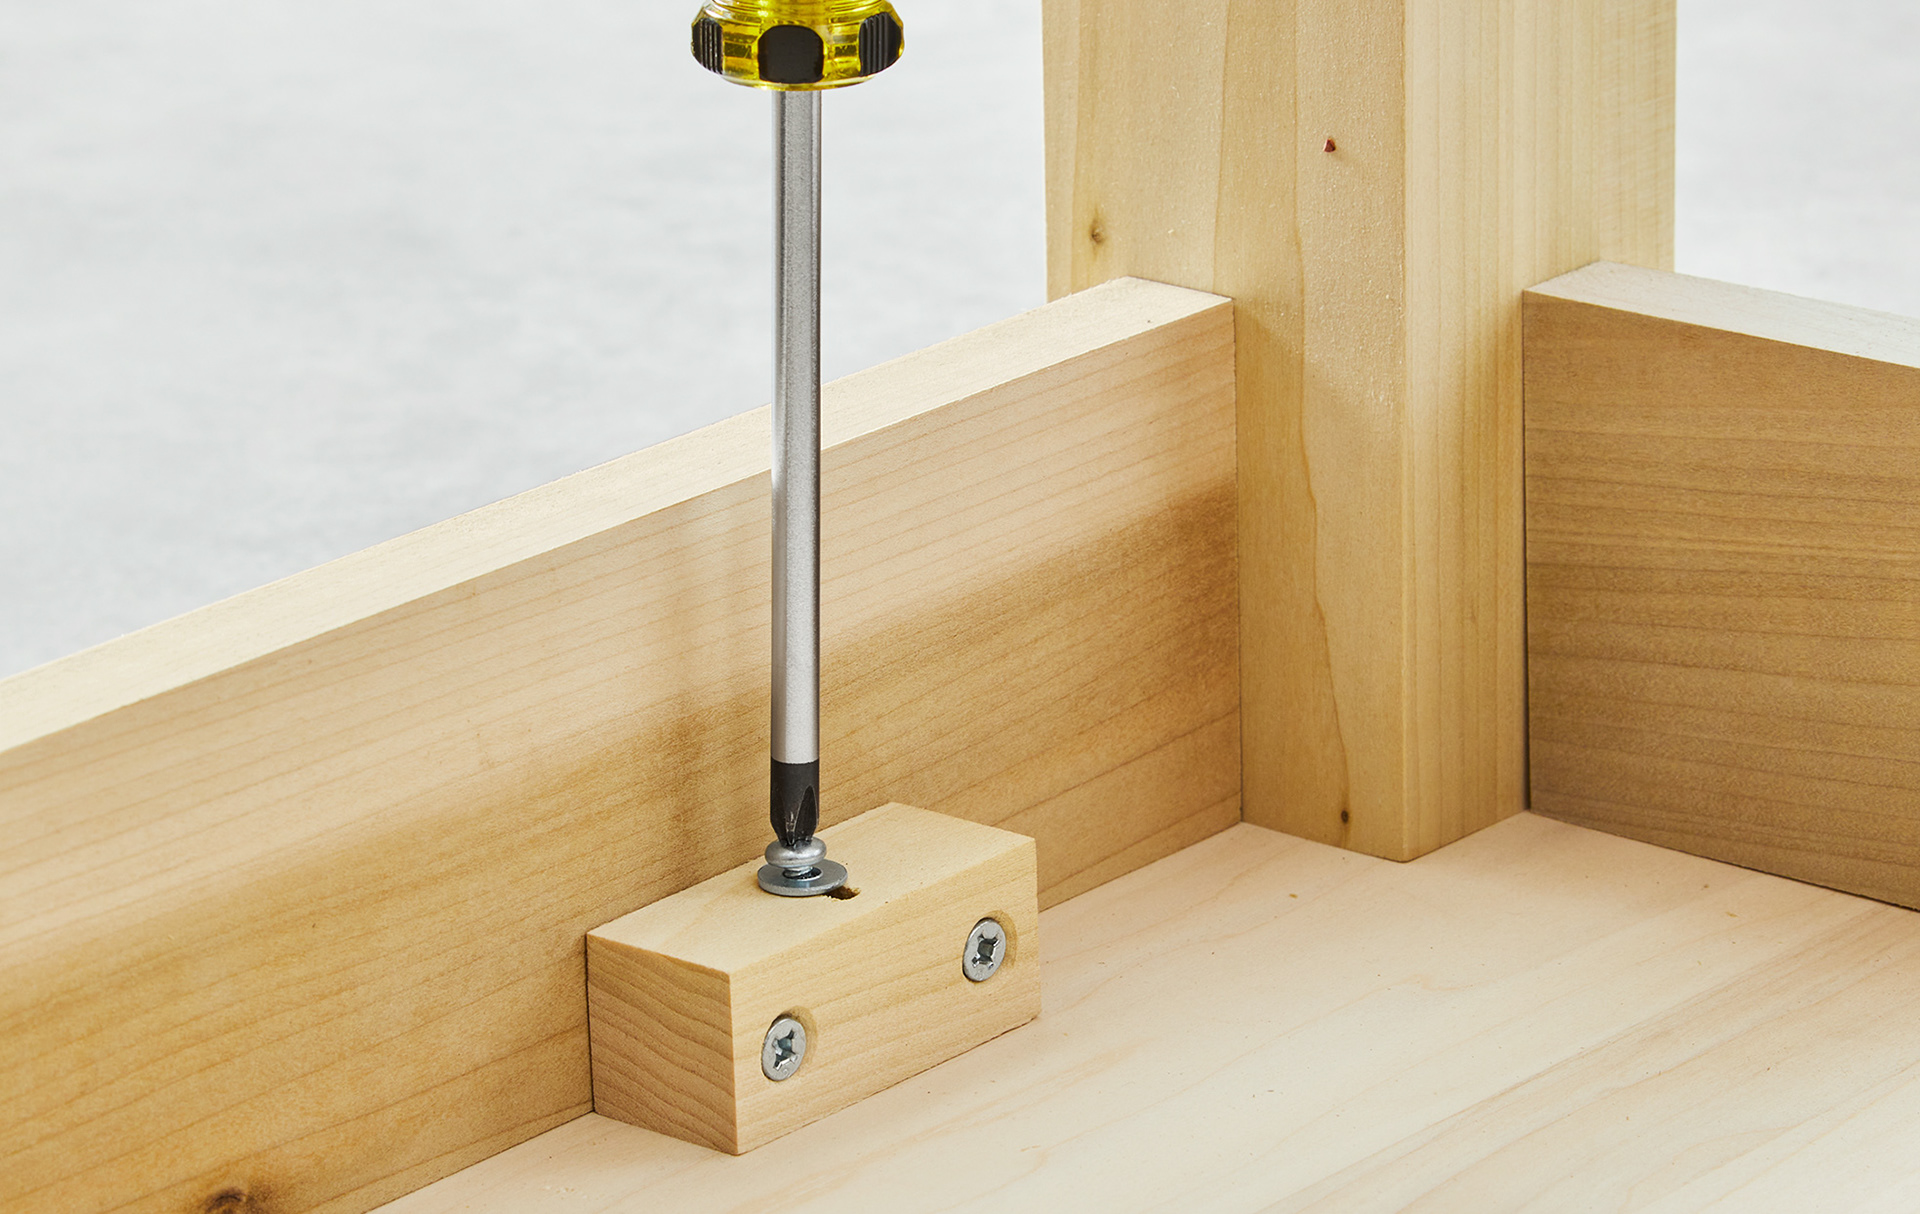
Attaching Panels to Frames
- Estimating wood movement
- Figure Eight
- Wood Block
- Slotted Stretcher
- Wood Buttons
- Figure Eight
- Wood Block
- Slotted Stretcher
- Wood Buttons
Process
- make the cross lap using a stacked dado and the table saw sled
- make the mortise for the blind tenon using the drill press and a chisel
- cut the slot for the bridle joint using the tenon jig and a chisel
- Make the tenons using the table saw with a tenon jig and the sliding crosscut table
- Make the mortise for the floating tenon (domino) using the domino joiner
Materials
Your exercise will be made from poplar (a hardwood) that is provided by the college/department
Deliverables:
two 1” x 2” x 12” boards that have a cross lap in the center, a floating tenon off-center, a blind tenon on one end, and a bridle joint on the other end.
Lap Joints

Half Lap

Half Lap

Cross Lap

Cross Lap
Mortise and Tenon

Mortise and (Blind) Tenon
Through Tenon

(Wedged) Through Tenon

Bridle Joint

Floating (or loose) Tenon
Attaching Panels to Frames
Wood Blocks
Figure Eight
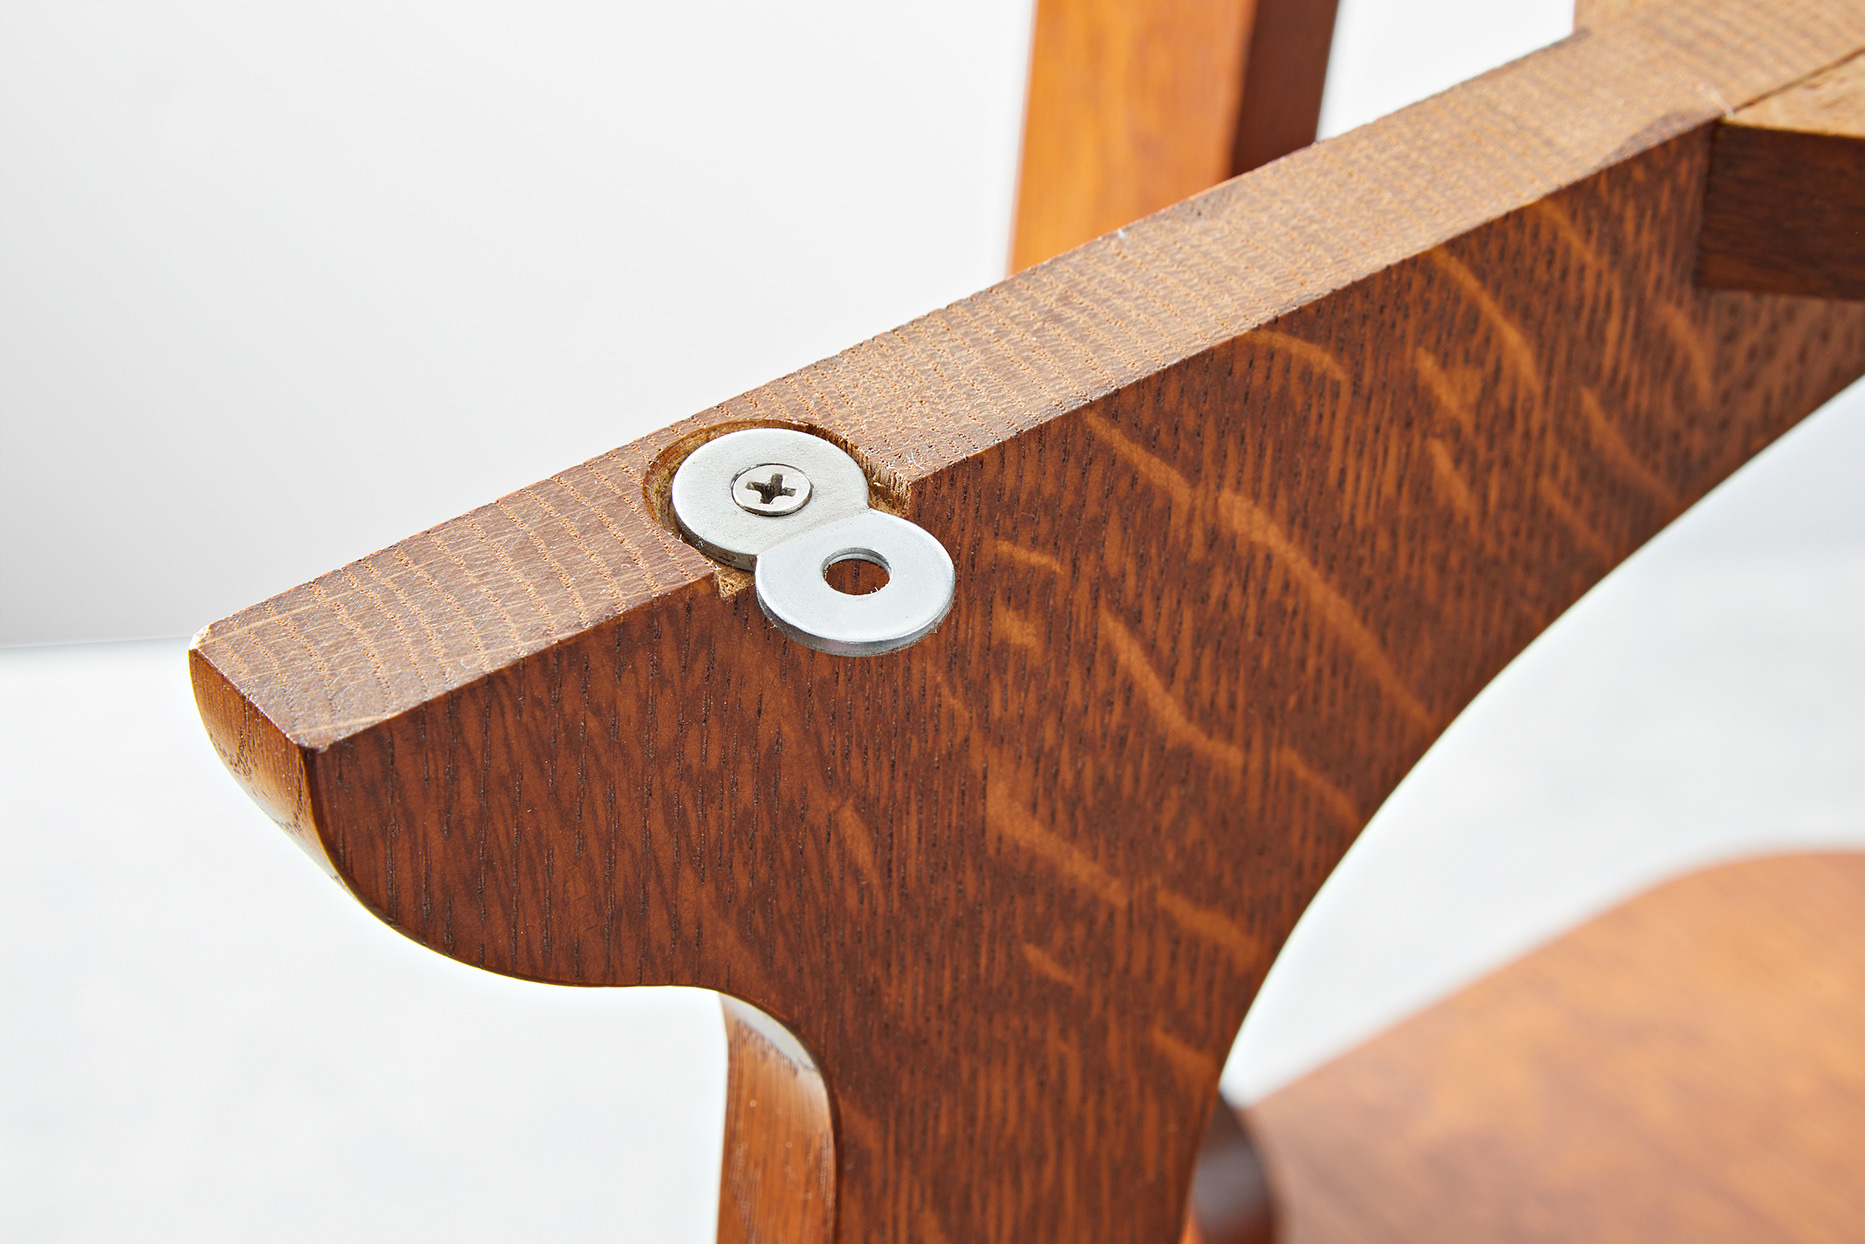
Figure 8
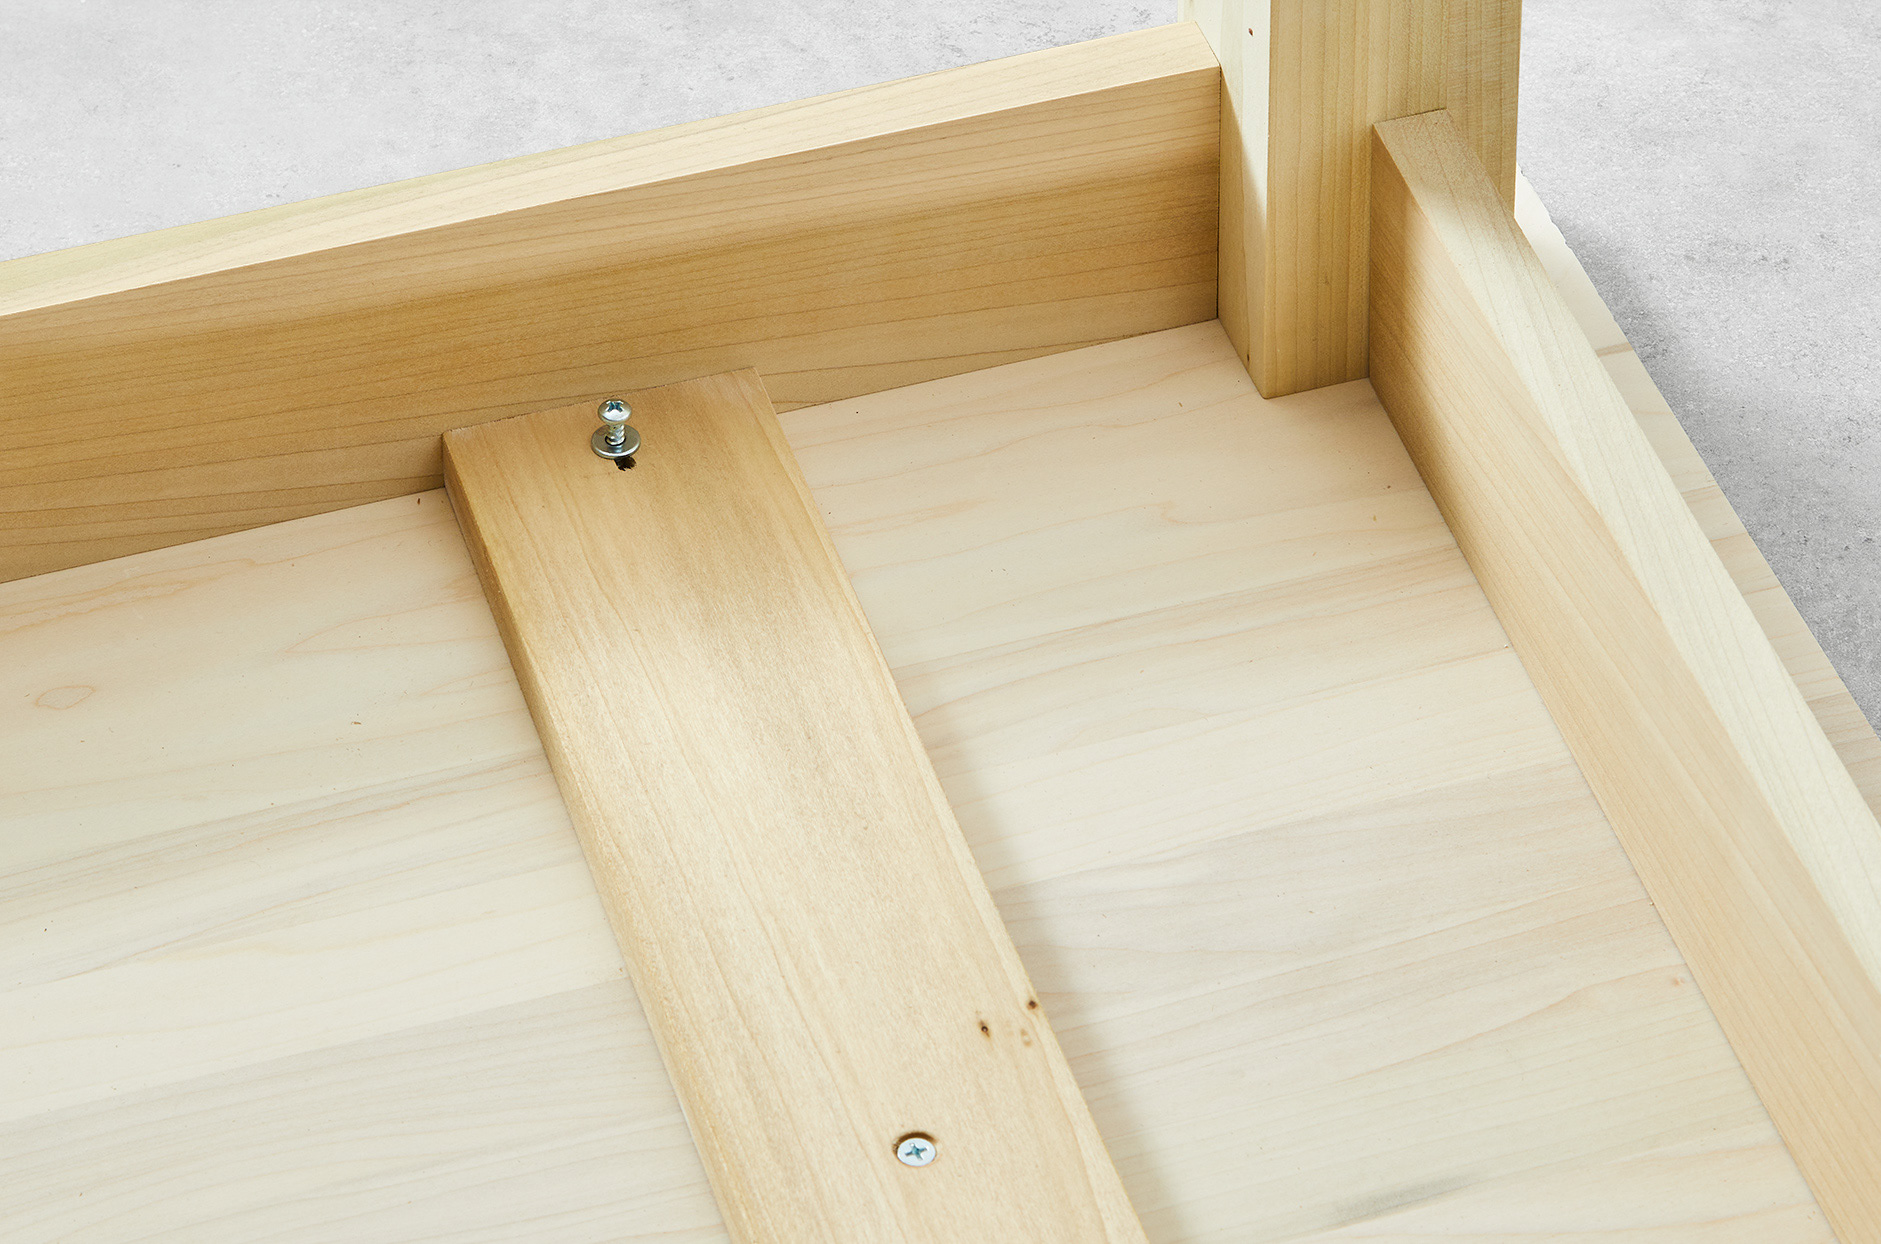
Slotted Stretcher